If you have any questions, feel free to contact me at envizex at arganite dot com.


First thing you want to do is to download the files. Following files are necessary:
Next thing to do is to execute the file install.gen.
$ chmod 755 install.gen
$ ./install.gen
The install script will install all the files into the directory /usr/lib/X11/700X/. I selected all packages to be installed.
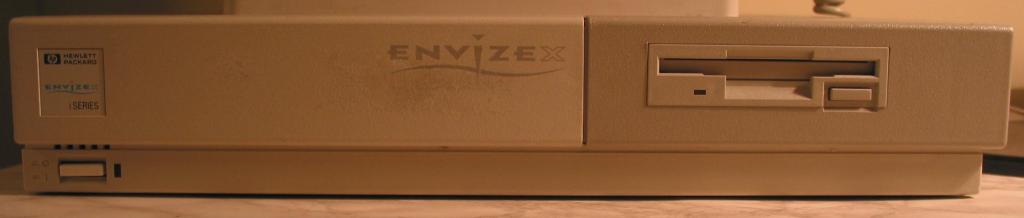
As the HP Envizex is just a X-Terminal you need to have a server where the boot image can be loaded from. This can either be done via NFS or TFTP. In the BIOS you can specify if you want to use BOOTP/DHCP. Or you supply the network configuration manually.
The NFS or TFTP server should run on any Unix. I used it only on Red Hat Linux 7.0. But it shouldn't matter what Unix as long as the client can read the boot image.
$ cd /tftpboot
$ ln -s /usr/lib/X11/700X 700X
To enable your tftpd (using red hat linux 7.*) just edit the file /etc/xinetd.d/tftp and change the line disable = yes to disable = no. Then just a /etc/init.d/xinetd reload and your TFTP server should be up and running.
As soon as the envizex has loaded its bootimage it will try to connect to the server using XDMCP.
On the linux side I changed the file /etc/X11/gdm/gdm.conf in the [xdmcp] section from Enable=0 to Enable=1.
Next step is to boot your now to the network connected envizex. When the terminal comes up, click on the Setup button.
Now click on Network and select General. You have to change the following settings:
That's about. At least that's what I had to do to get my envizex up and running.
portmap:ALL
mountd:ALL
lockd:ALL
rquotad:ALL
statd:ALL
Then add the following lines to your /etc/hosts.allow:
portmap:10.0.0.4 //replace with your terminaladdress!
lockd:10.0.0.4
mountd:10.0.0.4
statd:10.0.0.4
rquotad:10.0.0.4
Then you need to add one line to you /etc/exports file. I have my image located under /mnt/envizex/700X, so
again replace this with the location on your machine:
/mnt/envizex/700X 10.0.0.4(rw)
Now, to start the nfsd. This is done by starting the services in this order.If you have the mountd running
on a machine with a firewall, it is handy to specify the port where it is running. This is done by adding
the option -p. I have put it in my /etc/rc.d/rc.local file, as then it will be started at startup. Start
the services in this order:
/sbin/rpc.portmap	//This is for slackware-users. If you're running another distro, replace the path
/usr/sbin/rpc.mountd //the -p option can be used to configure for a port
/usr/sbin/rpc.nfsd
/usr/sbin/rpc.statd
/usr/sbin/rpc.lockd
Now you should verify that NFS is running. This is done using the rpcinfo -p command. You should see
something similar to this:
root@arcanix:/etc/rc.d# rpcinfo -p
program vers proto   port
100000    2   tcp    111  portmapper
100000    2   udp    111  portmapper
100011    1   udp    857  rquotad
100011    2   udp    857  rquotad
100011    1   tcp    860  rquotad
100011    2   tcp    860  rquotad
100003    2   udp   2049  nfs
100003    3   udp   2049  nfs
100003    2   tcp   2049  nfs
100003    3   tcp   2049  nfs
100021    1   udp  32770  nlockmgr
100021    3   udp  32770  nlockmgr
100021    4   udp  32770  nlockmgr
100021    1   tcp  32768  nlockmgr
100021    3   tcp  32768  nlockmgr
100021    4   tcp  32768  nlockmgr
100005    1   udp  32772  mountd
100005    1   tcp  32771  mountd
100005    2   udp  32772  mountd
100005    2   tcp  32771  mountd
100005    3   udp  32772  mountd
100005    3   tcp  32771  mountd
100024    1   udp  32775  status
100024    1   tcp  32772  status
This is needed for the nfsd to run. Now you can boot up your envizex, and it should find its bootimage after you specified the necessary information on the machine itself.
These are steps I used to setup the X Server for accepting XDMCP requests:
In Linux X environment, you need to provide font using either X font server (xfs) or hard coded font path in XF86Config and XF86Config-4 configuration files. If you plan to use xfs font server (check here to see the xfs advantages), do this in RH 6.2 and Mandrake 8.x and 9.0, modify /etc/rc.d/init.d/xfs and make the following changes. This also works for Slackware 8.1 and 9.0. Change all (this is where the Font Server port):
| daemon xfs -droppriv -daemon -port -1 |
to:
| daemon xfs -droppriv -daemon -port 7100 |
In Mandrake 7.2, the port is already set to 7100. Also, in RH 7.x, it is by default, for security enhancement, not listening to TCP port any longer! If you like to setup X font server, do the following steps:
Change this line in /etc/rc.d/init.d/xfs:
| daemon xfs -droppriv -daemon |
to:
| daemon xfs -droppriv -daemon -port 7100 |
Then, in /etc/X11/fs/config, comment out this line:
| # don't listen to TCP ports by default for security reasons #no-listen = tcp |
If you change or add the port, use this command to restart your X font server (requires root):
| service xfs restart |
You do not have to use port 7100. You can set a different port, as long as you carefully plan it first to make sure no conflicts in using the port number and change it accordingly. It is better to consult your Linux admin before doing so, so that he/she knows the port has been taken! Different Linux distribution may put the xfs in different folder under /etc/rc.d. You may search for it if that's the case.
Modify /etc/X11/xdm/xdm-config and make the following change. Be default (in most Linux distributions), this line is set, so that it is not listening to XDMCP connection. This is for security reason. For Caldera using kdm, this file is at /etc/X11/kdm. Find this line:
| DisplayManager.requestPort: 0 |
and comment it out as:
| ! DisplayManager.requestPort: 0 |
Remember, this does not affects gdm. For gdm setup, it is in the following section.
In /etc/X11/xdm/Xaccess, change this. (this allow all hosts to connect). For Caldera using kdm, this file is at /etc/X11/kdm. Set the security to 644 (chmod 644):
| #* # any host can get a login window |
to:
| * # any host can get a login window |
The above setup is in a Broadcast mode, which will list all the X Server that are listening and willing to manage your X connection. If you only want to allow certain connections, use the CHOOSER section in this same file. An example can be found in the Resources.
I use the gdm as default and use gdm login window to switch between KDE and GNOME. For gdm, edit /etc/X11/gdm/gdm.conf. This activates XDMCP, causing it to listen to the request. For kdm (if you pick KDE as your DM in your installation), edit /usr/share/config/kdm/kdmrc for Mandrake and /etc/kde/kdm/kdmrc for Red Hat or /opt/kde2/share/config/kdm/kdmrc for Slackware version (KDE2). Change this line:
|
[xdmcp] Enable=false (may shown as 0 in some distributions) |
to:
| Enable=true (or 1 in some distributions) |
Make sure "Port=177" is at the end of this block.
Now edit /etc/inittab and change the following line:
| id:3:initdefault: |
to:
| id:5:initdefault: |
In Slackware, the X11 mode is number "4", not "5".
This is switching from Text Mode login to Graphical Mode using Display Manager. Before changing this line, you can use the telinit command to test prior to modifying the line. Use either telinit 3 to set to level 3, or telinit 5 to set to level 5, graphics mode (you can issue this command on the second machine that telnets into this server).
Make sure the proper security of the file /etc/X11/xdm/Xservers is set to 444 (chmod 444).
Locate /etc/X11/xdm/Xsetup_0 and chmod 755 this file.
Edit the XF86Config file (if you are using XFree86 4.x, the file is XF86Config-4) at /etc/X11 and change the line:
| FontPath "unix/:-1" |
to:
| FontPath "unix/:7100" |
If you decide to use the port number other than the usual 7100, be sure to change both in "/etc/rc.d/init.d/xfs" file and here!
To save your time and energy, I recommend you to add the FontPath in the XF86Config and XF86Config-4 configuration files. If you are not sure what fonts are available to you, you can use this command to check it out (requires root):
| chkfontpath --list |
The following are some of the example fonts for your reference. Make sure you have these fonts before editing these path.
|
FontPath "/usr/X11R6/lib/X11/fonts/75dpi/" FontPath "/usr/X11R6/lib/X11/fonts/misc/" FontPath "/usr/X11R6/lib/X11/fonts/CID/" FontPath "/usr/X11R6/lib/X11/fonts/Speedo/" FontPath "/usr/X11R6/lib/X11/fonts/100dpi/" FontPath "/usr/X11R6/lib/X11/fonts/Type1/" |
(You do not have to make this change. You can keep the default setting, but this is what I prefer. If you are not sure, leave this alone.) Change this line to the end of /etc/inittab:
| x:5:respawn:/usr/bin/gdm |
If you decided not to change this line, it is fine! This is not a required step, but of a personal preference!
You are now ready to run a test.
One other thing to know (that some users have asked) is how to display with Willing to manage message with load info As I know this is available in xdm by adding the following to the etc/X11/xdm/xdm-config.
| DisplayManager.willing: su noboby -c /etc/X11/xdm/Xwilling |
| Willing=/etc/X11/gdm/Xwilling |
|
Getting the Floppy Drive to work. |
|
This is quite a simple thing to do. It costed me some research, but in the end it all came down
to adding one line to your /etc/fstab. Suppose the user who is using the terminal is called "John", and his accountname is "johnw", then add this to your fstab: johnw:/hpxtfd /mnt/xtflop nfs user,noauto,exec,nosuid 0 0 This will enable you to mount the floppy to /mnt/xtflop. |
|
document last modified: 20 may 2011 If you have any questions, feel free to contact me at envizex at arganite dot com. |
|